Colby Valve
Colby Valve
  • Home
  • About
  • Pages
    • Terms
  • Shop
  • Wholesale
  • MORE
    • Our Products
    • How To Install
    • Videos
    • FAQs
    • Industries We Serve
    • Store Locator
    • Contact Us
  • More
    • Home
    • About
    • Pages
      • Terms
    • Shop
    • Wholesale
    • MORE
      • Our Products
      • How To Install
      • Videos
      • FAQs
      • Industries We Serve
      • Store Locator
      • Contact Us
  • Home
  • About
  • Pages
    • Terms
  • Shop
  • Wholesale
  • MORE
    • Our Products
    • How To Install
    • Videos
    • FAQs
    • Industries We Serve
    • Store Locator
    • Contact Us

INSTALLATION

how to install a Colby Valve (VIDEO)

How to replace a tire valve - Emergency Colby Valves install in under a minute. Watch this video to see a quick and easy tire valve installation.

EMERGENCY TIRE VALVE installation

NO TOOLS REQUIRED

  • Step 1: Remove failed tire valve
  • Step 2: Fully insert Emergency Colby Valve  
  • Step 3: Twist until snug (don't twist too tight)
  • Step 4:  Air up the tire
  • Step 5:  Replace the Emergency Colby Valve Tire Valve with a permanent option for best results.  Here is a video to show you how it is done.

permanent TIRE VALVE installation

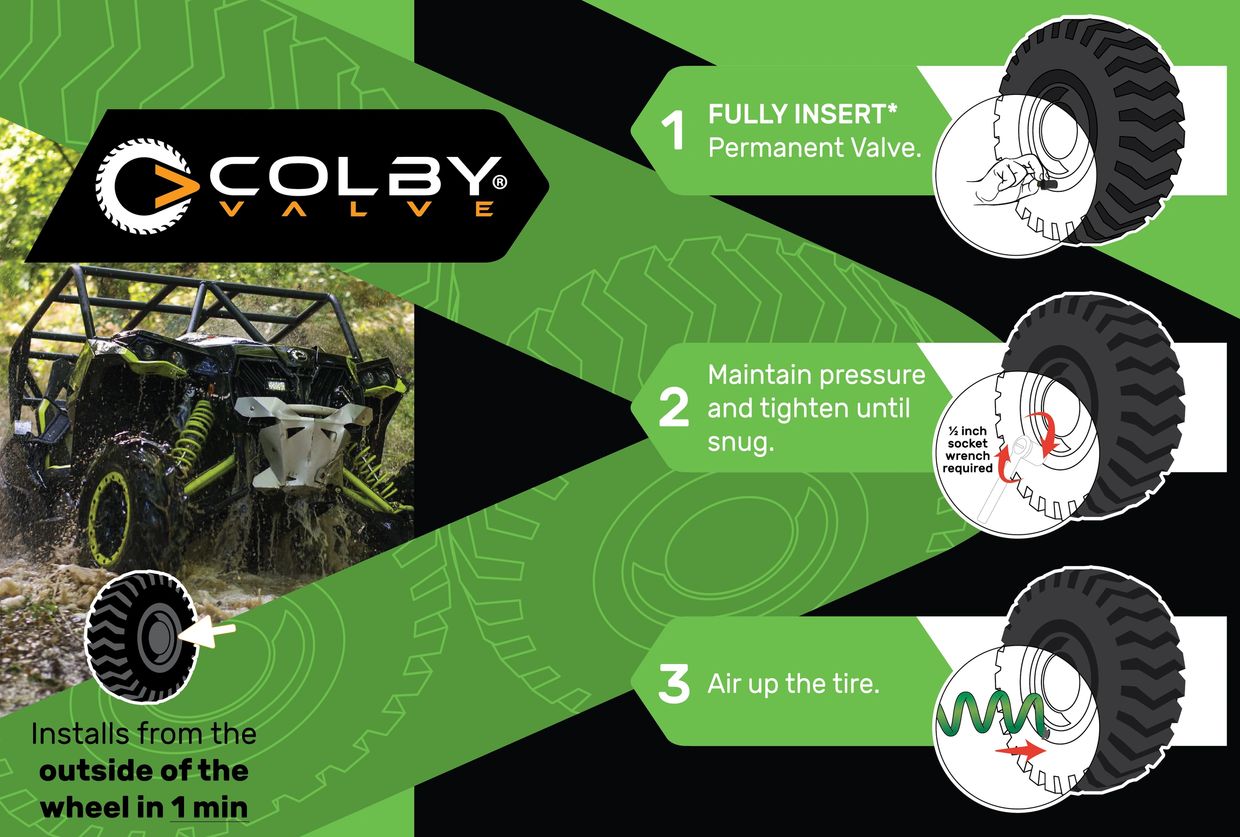
1/2"* WRENCH REQUIRED

  • Step 1: Do not remove tire or wheel from vehicle
  • Remove damaged, leaking or original tire valve
  • Insert Colby Valve Permanent Tire Valve and maintain pressure
  • Secure into place with a 1/2 inch socket wrench
  • Air tire with air or use a portable air compressor 
  • *adjust socket wrench size for larger permanent valves


Copyright © 2023 Colby Valve - All Rights Reserved.

  • Terms
  • Shop
  • Wholesale
  • Store Locator
  • Contact Us
  • Marketing Materials
  • Terms and Conditions
  • Privacy Policy

Powered by GoDaddy

This website uses cookies.

We use cookies to analyze website traffic and optimize your website experience. By accepting our use of cookies, your data will be aggregated with all other user data.

Accept